

The complete guide
How to Choose a Fort Building Kit That Kids Actually Keep Using
The problem with couch cushion forts
Every family with kids has lived through this. Someone decides the lounge room is now a castle. The dining chairs come out of position, every cushion leaves the couch, and the good doona gets dragged across the carpet and pegged to a bookshelf with clothes pegs. Twenty minutes later the whole thing sags, a chair tips, and the builder is in tears because it fell down again.
The instinct behind it is good. Kids want an enclosed space they control. What they are missing is a frame that holds its shape without furniture holding it up.
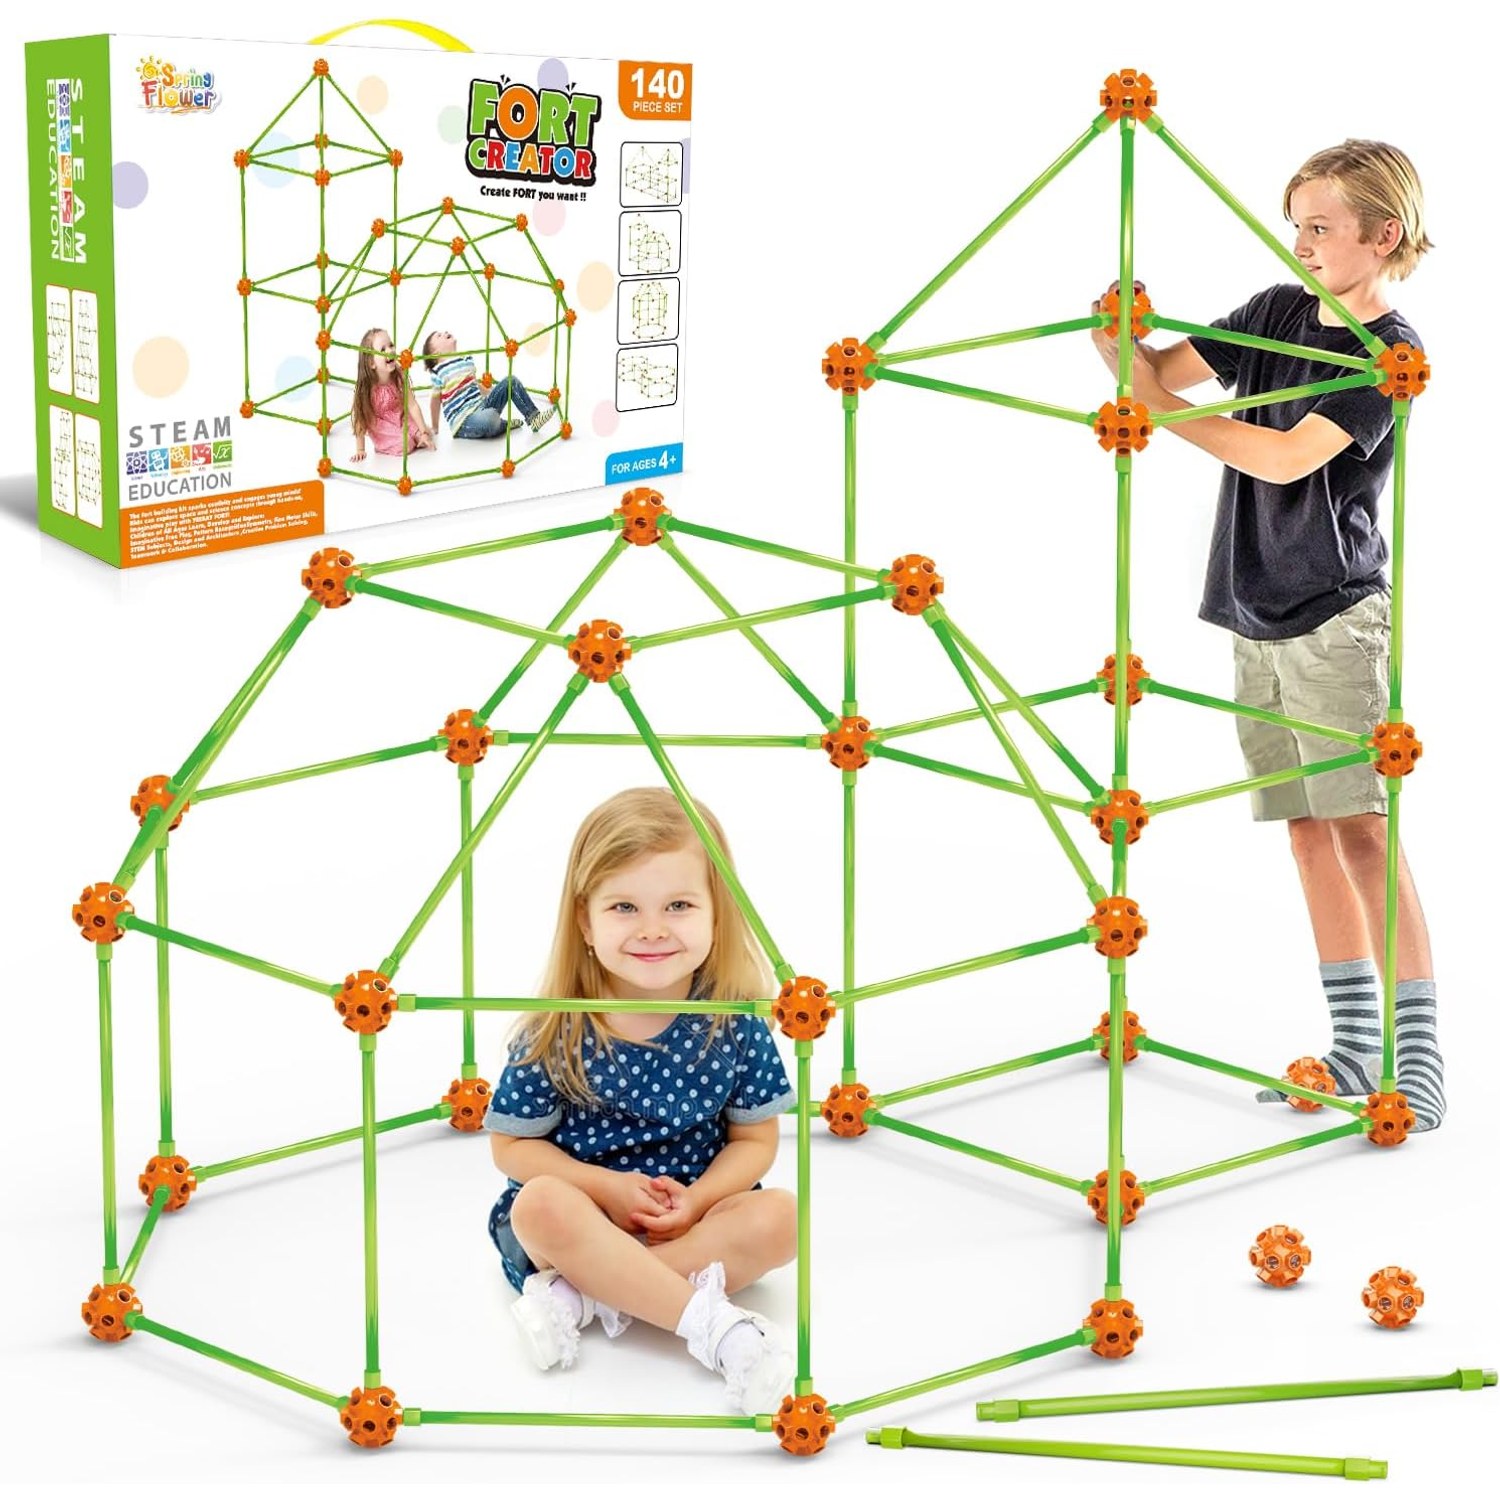
That is the gap a fort building kit fills. Instead of borrowing structure from the room, the child makes the structure. Rods become edges, connectors become corners, and suddenly a shape stands up on its own without anyone balancing a chair against it. The sheet goes over the top, and the fort stays a fort until someone decides to change it.
How a rod and connector kit works
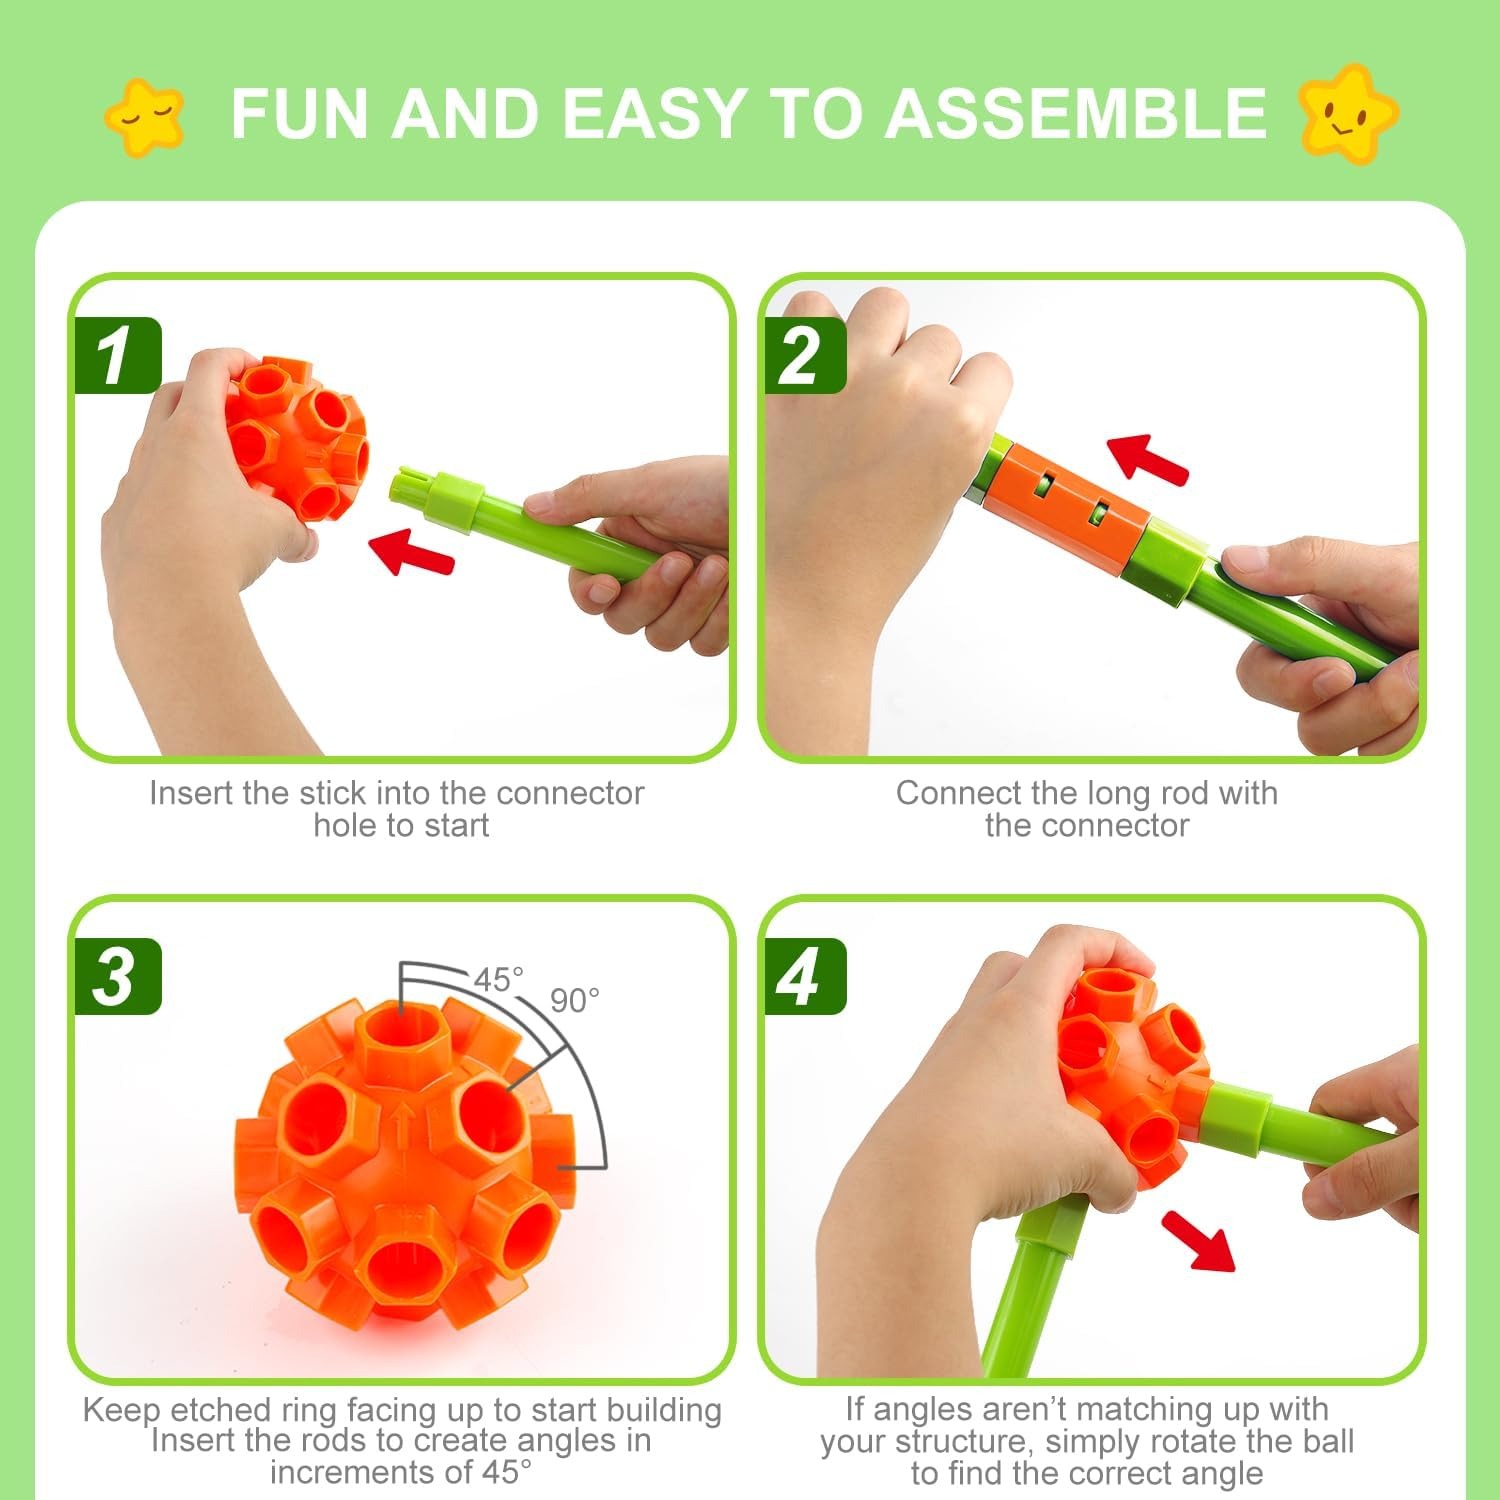
The system is about as simple as construction toys get. You have two kinds of parts. Connectors are the joints, with holes pointing in different directions. Rods are the straight lengths that span between them.
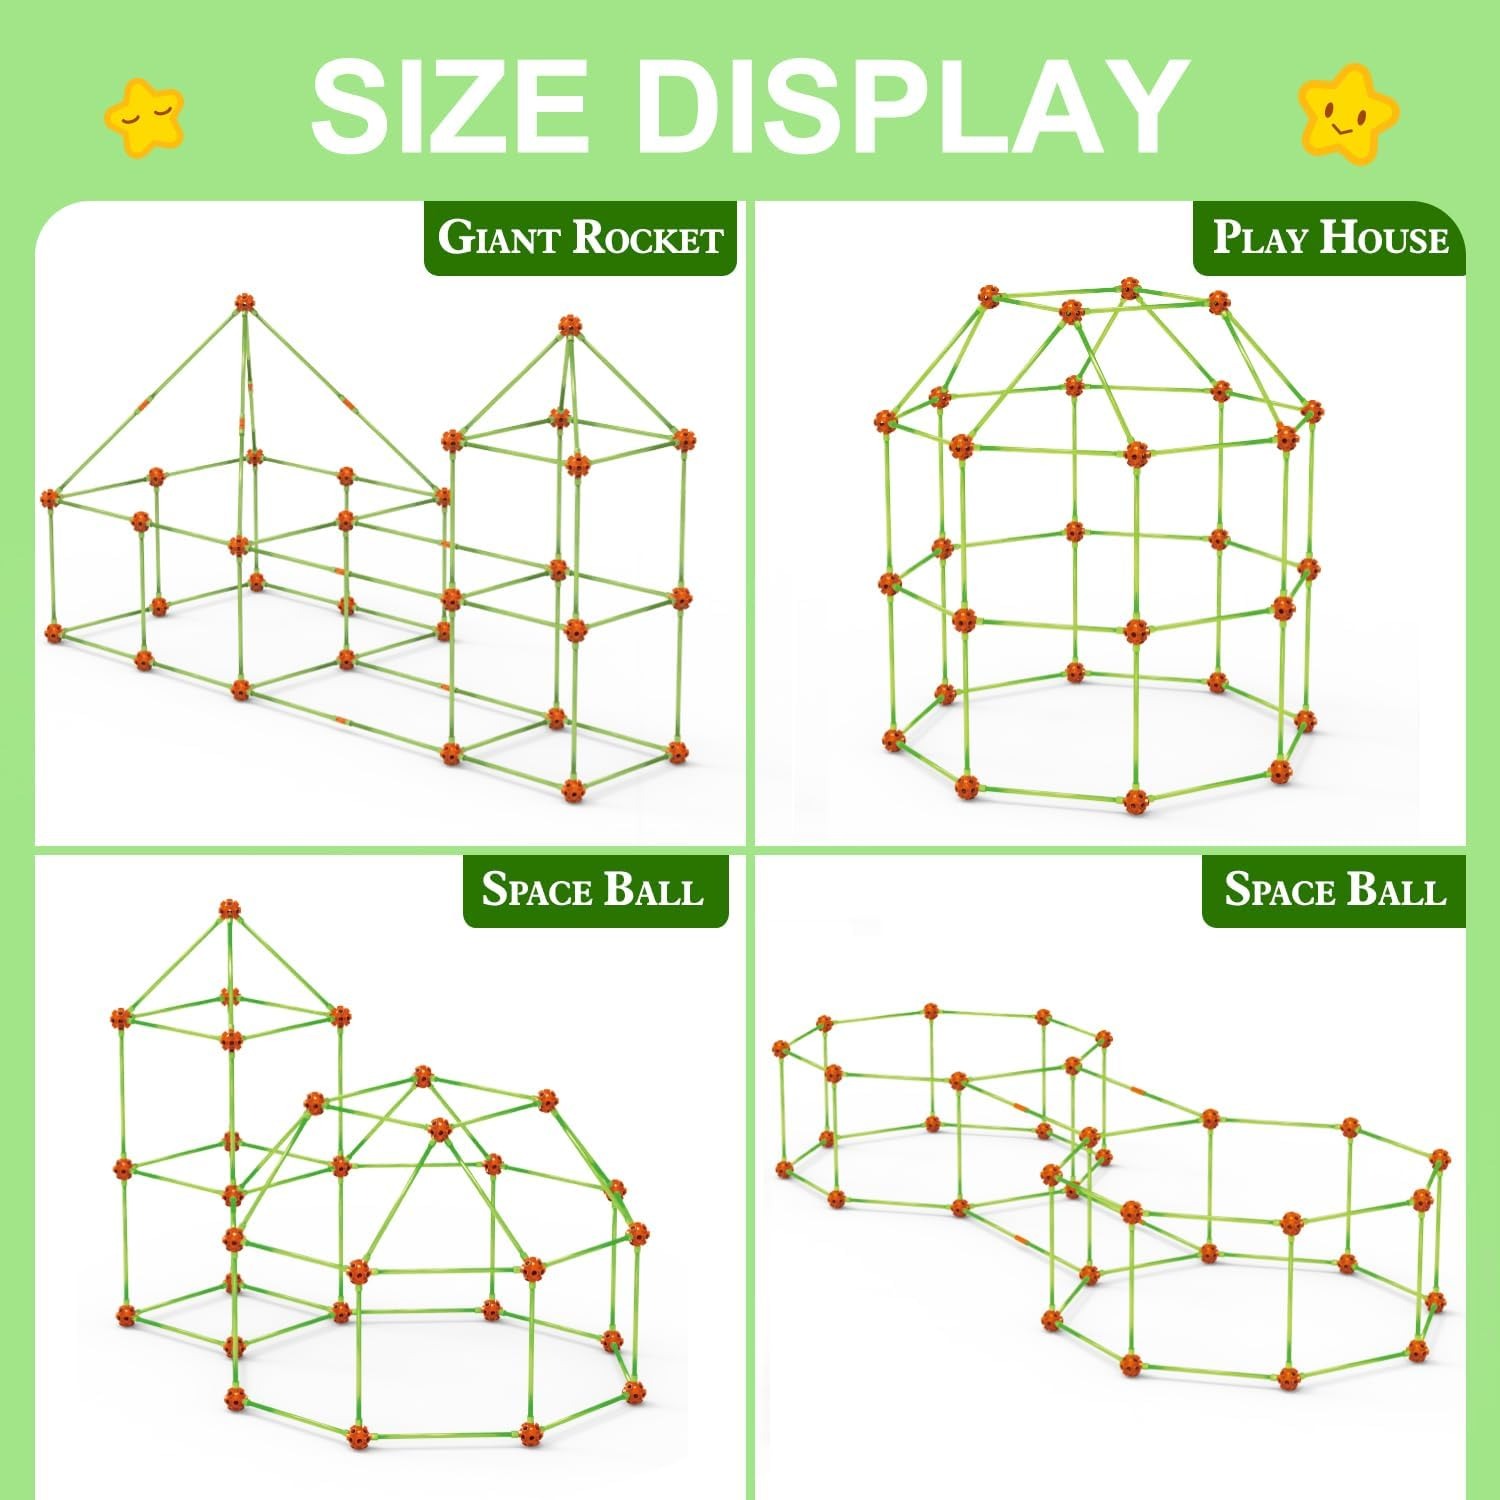
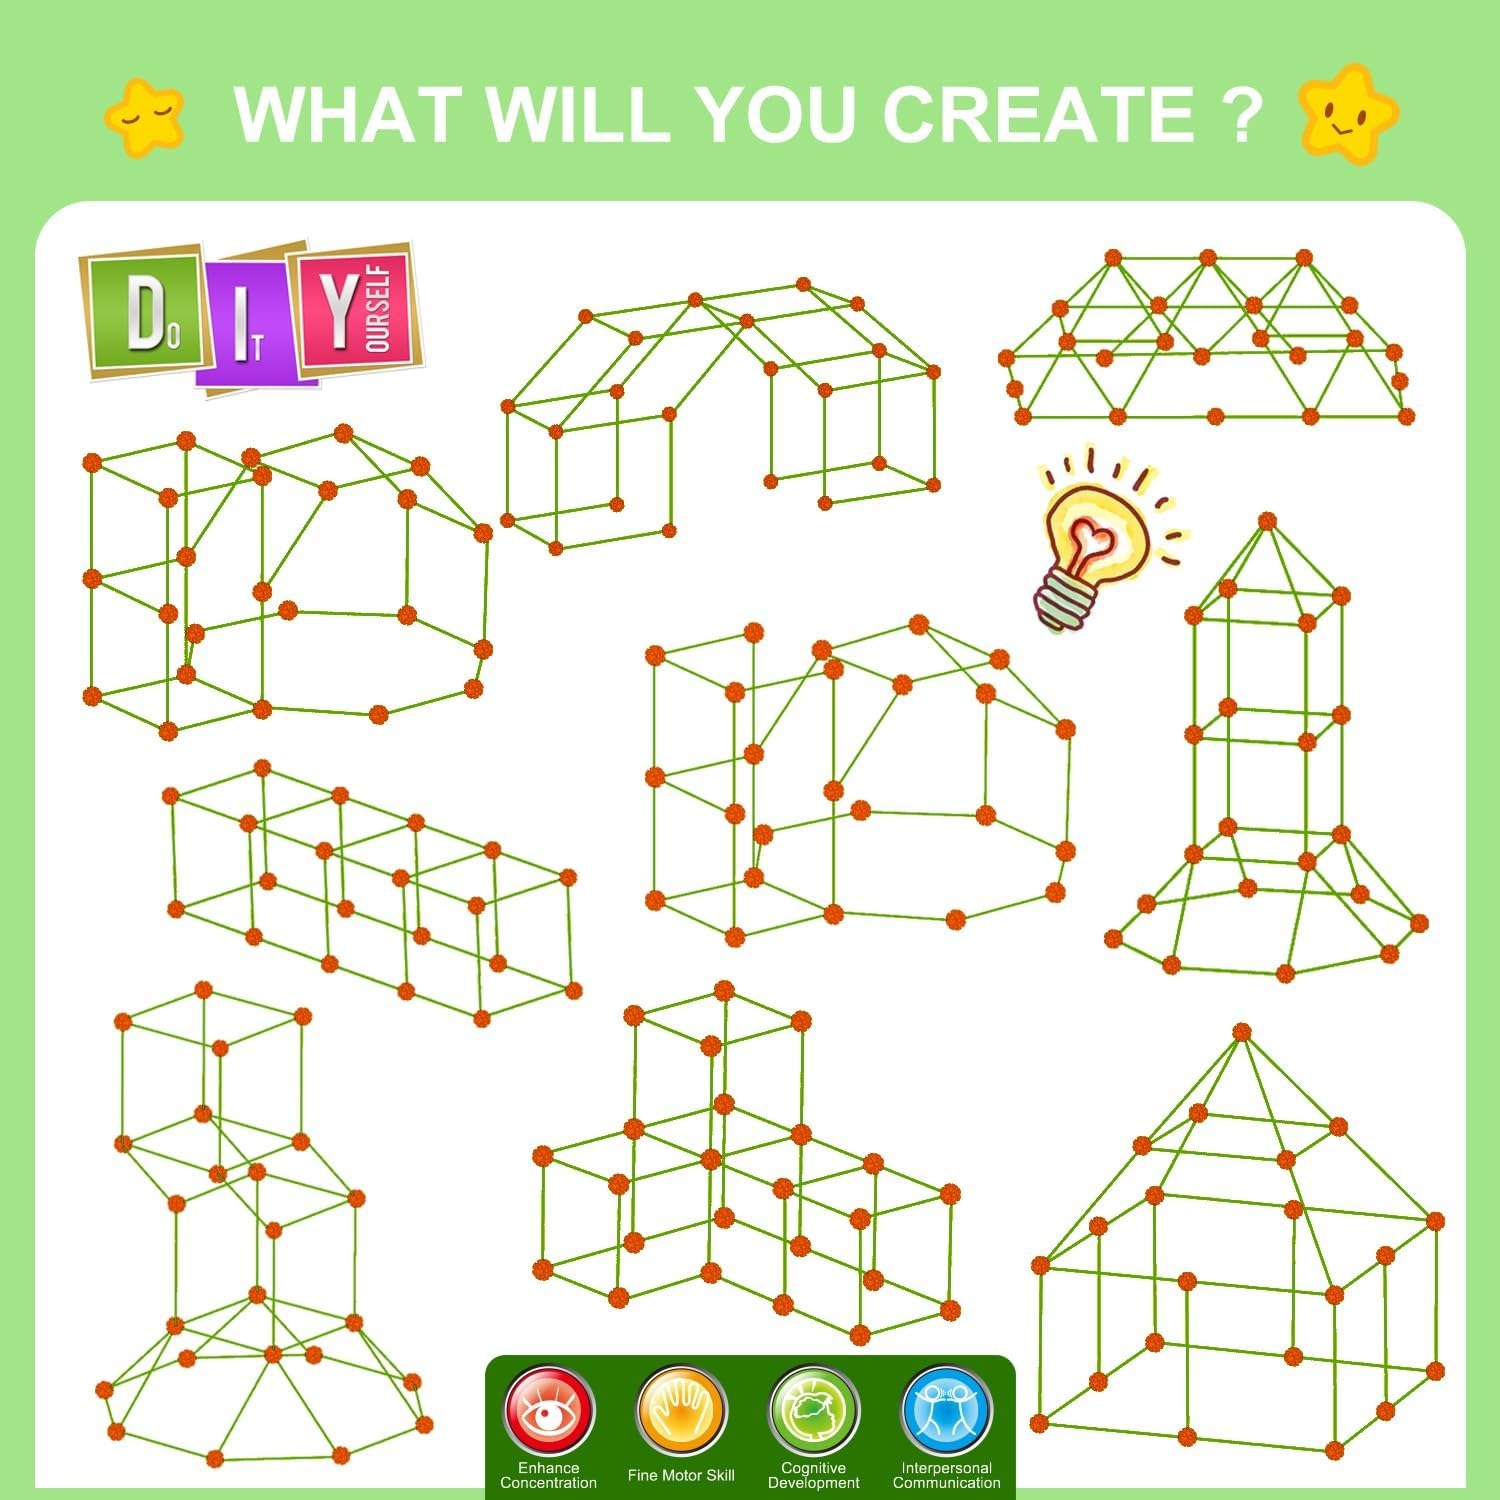
A child pushes a rod into a connector hole. Repeat that four times and you have a square. Add four more rods standing upward, cap them with another square on top, and you have a cube big enough to sit in. From there everything is a variation. Lean the top rods inward and you get a tent. Stretch one side out and you get a tunnel. Stack a smaller shape on top of a larger one and you get a tower.
This set has 140 pieces, which is a useful number. It is enough for one decent sized fort that two or three kids can sit in, or enough to split into a couple of smaller dens if the children would rather each have a base. The parts are plastic and described as lightweight, so a child can carry a half built section from the lounge room to the hallway without an adult lifting it.
Nothing in the kit needs batteries, glue or tools. The listing confirms assembly is required and the operation mode is manual. That assembly is not a chore to get through before the fun starts. It is the whole activity.
What kids actually learn while building
Parents often buy a building set hoping it is educational, then feel vaguely guilty when it just looks like play. With this kind of toy the learning is genuinely baked in, and it happens without anyone announcing it.
The first lesson is that squares wobble. A four sided shape made of rods can shear sideways, and kids discover this the moment they lean on it. Then someone adds a diagonal rod and the wobble stops. That is structural bracing, learned by hand in about ninety seconds, and it sticks far better than a diagram would.
The second lesson is about proportion. Build a tall, thin tower and it tips. Widen the base and it stays. Children work out the relationship between height and footprint by failing a few times, which is exactly how engineers work out most things.
Then there is the planning side. Before a big build, kids start counting pieces and deciding how to spend them. Do we make one big fort or two small ones? Do we want height or length? That is budgeting and project planning in disguise.
Finally, when more than one child is involved, you get the social layer. Who builds which wall, whose design wins, what happens when someone's idea does not work. Group construction is messy and loud and genuinely useful.
Who this set suits
The manufacturer recommends ages 36 months to 12 years. In practice that range plays out in stages.
Around three and four, children mostly need an adult to start the first shape, then they take over the adding and the knocking down. They are not planning yet, they are experimenting with how parts join. That is fine, and it is still useful play.
From five to around eight is the sweet spot. Kids at this age can picture a shape before building it, they have the hand strength to push joints together firmly, and they are deep into pretend play. The fort becomes a shop, a spaceship, a vet clinic and a cave in a single afternoon.
From nine to twelve, the building gets more deliberate. Older kids design multi section layouts, try arches, and care about whether the thing looks right. A sibling pair spanning both ends of the range usually works out well, with the older one leading the design and the younger one fetching rods.
A single child will use it too, though forts are naturally social. If your child mostly plays alone, pairing the set with a few soft toys and a reading lamp tends to extend its life.
How to choose between building kits
If you are comparing options, a few things matter more than the marketing on the box.
Piece count is the obvious one. Below about a hundred pieces, you are limited to small structures that a child outgrows quickly. At 140 pieces there is room for a sit inside fort with parts left over, which matters for group play.
Weight is underrated. A heavy set is harder for small hands and worse if a wall comes down. Lightweight parts make independent building realistic, and they make it safe enough that you can leave kids to it in the next room.
Open ended beats instruction led. A kit that builds one specific model gets built once and shelved. A kit with no fixed outcome gets rebuilt every week. There is no picture on the lid here that the child is meant to recreate, which is the point.
Think about storage before you buy. Any 140 piece set needs a home. A lidded tub, a storage bag or the original box all work. Deciding this on day one saves you finding connectors under the couch in six months.
And consider the room. A sitting sized fort wants roughly two by two metres of clear floor. If your lounge room is tight, a hallway or a bedroom floor usually does the job.
Keeping it in good shape
Care is straightforward. Wipe the rods and connectors with a damp cloth and a little mild soap when they get grubby, then dry them off before packing away. Skip the dishwasher, the washing machine and hot water, all of which can warp or weaken plastic.
Keep the set out of long stretches of direct sun and away from heaters. Plastic left baking in a sunny window gets brittle over time.
Before each build, give the pieces a quick look. Set aside anything cracked or split rather than letting it go back into a wall. Counting pieces back into the container at pack up time is the single habit that keeps the set complete, and it also turns tidying into part of the game.
If you are draping a cover, pick something light. A flat single bed sheet or a thin throw sits over the frame without pulling joints apart. Heavy doonas tend to bend the top rods inward.
Using it as a gift
This set works as a present partly because it does not require the recipient to be at a specific age or stage. A three year old and an eleven year old can both open it and find something to do, which is rare.
It also opens into an activity the same day. There is no battery hunt, no charging, no setup by a parent before the child can start.
For birthdays, rainy school holidays, Christmas or a long weekend at the grandparents, it earns its space. It is also one of the best rainy day activity for kids options to keep in a cupboard for when plans fall through.
The short version
A fort building kit gives children a frame for the thing they already want to do. Rods and connectors clip together by hand, 140 pieces is enough for a den big enough to sit in, and the lightweight plastic means kids can build and rebuild without help.
It suits ages 3 to 12 according to the manufacturer, it needs no batteries, and it packs back into a tub when you want your lounge room back. The learning is real but it never feels like a lesson, which is the only kind of educational toy that gets used twice.
Clear a patch of floor, hand over the box, and find a spare sheet. The rest takes care of itself.